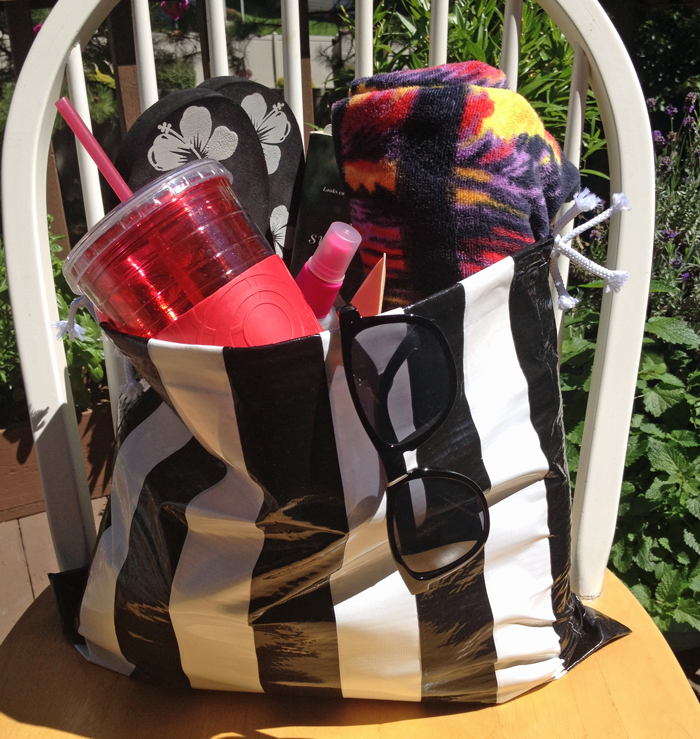
I found the cutest little red and white striped beach bag on Spoonful. The instructions were clear, there were very few supplies needed, and it looked pretty easy. We’re always a little skeptical with DIY projects because a lot of times our end result looks nothing like theirs, only to discover a key step was missing from their instructions. But that wasn’t the case in this tutorial. It was so easy to make, and fun, fun, fun! I loved how mine turned out! (The photo of the bag would have looked much better on a beach in Hawaii, but ya’ gotta work with what ya’ got).
These are the supplies you’ll need. I used a huge piece of cardboard as my work surface, which worked out perfectly! (This image shows a blue Flair pen, but I switched to a regular black Sharpie so I could see my lines more easily).
Step #1
I cut along one side and the bottom of my garbage bag, taped it to my cardboard, then drew my 16×30 rectangle. I taped the hell out of my bag with just regular scotch tape to keep it laying flat on the board. It behaved well and stayed right where I put it. In fact it kind of static-ic itself to the board making it easy to smooth out and tape.
Step #2
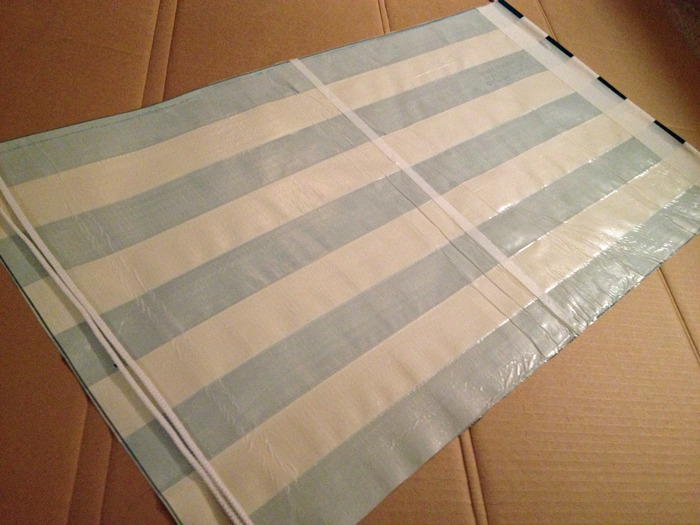
I started taping in alternate colored duct tape, overlapping just a hair with each stripe. I thought this part would be a pain, but it was so simple. If you screw up your stripes and have to reposition the tape, it easily lifts from the garbage bag without tearing it.
Step #3
When I was done with my stripes, I cut along my rectangle lines all around. I had covered up the lines when I started doing my taping, so I just grabbed my ruler and Sharpie’d a line over the top of the tape to use as a guide. Easy peasy.
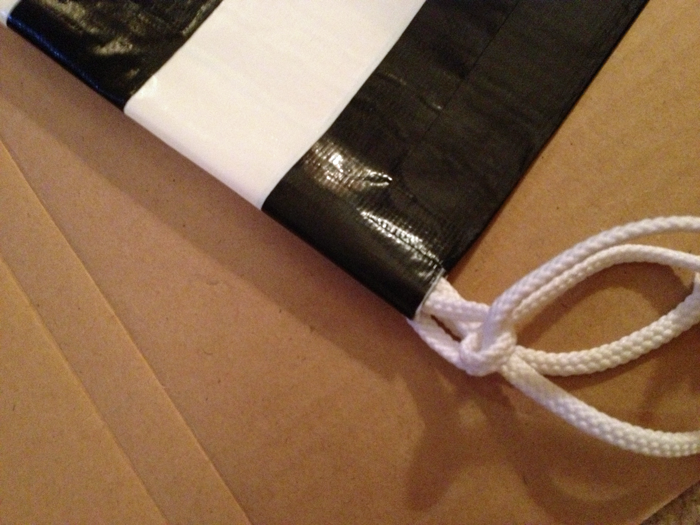
I flipped my rectangle over, measured down an inch on both short ends, and folded the end over my cords. I taped the folded-over ends in place with scotch tape to keep them down, then taped over them with the duct tape. I wasn’t picky with the duct tape placement…I just pushed the cords up toward the fold and then started the top edge of my duct tape just below.
Step #4
After my ends were taped, I flopped the bag in half and taped the sides. I started the tape just underneath the cords with half the width of the tape on the bag and the other half hanging toward me off the bag. Then I turned the bag over and stick the hanging out length to the opposite side of the bag. I used the same color tape to close the sides as the color of the end stripe so the side tape seam was less noticeable. Check it out below – you can barely see it!
The last thing you need to do is knot the cords. Work on one side at a time. Take the two top cords and knot them together. Then knot the two bottom cords together. Do the same on the other side. Make sure the knots are tight. To cinch the bag, grab the top of the bag on one side and pull both the cords on that side.
Cute, cute, cute! It only took a little over an hour to finish, it’s the perfect size, it’s waterproof, and it folds up small enough to tuck into your purse or pack easily.
Thank you, Spoonful, for the great tutorial!
Have you “Liked” us on Facebook yet? C’mon over and join us! CLICK HERE.


