
 If I can’t buy it, I’ll make it. That’s my mantra. Well, it’s now my mantra. Welcome to the first day of me realizing it.
This Christmas, I wanted to make something cool for my son but I also didn’t want it to be some cheesy gift that would fall apart and add nothing to his every day world (okay, my every day world). Once I started creating this blasted thing, I got to thinking about all the words I could make and how I could take this mother to a new level.
I made a custom marquee sign. It’s super cool and a total pain in the ASS!! Don’t let that steer you in the other direction. There’s hope. I went through all the tutorials I could find online. I read through, I reread and still couldn’t understand how you could take poster board and foam board and create the sign. So, I just dove in. Turns out, EVERYONE left out some key points and steps in the process.
I’ll walk you through every painful step and every freaking emotion I felt while making the sign. I still have questions but it’s done and ready to go up on the wall. Now think…what word do you want to create?
Supplies – every single one of them:
- Poster board (white – I used 3)
- Foam Board (white – I used 2)
- Glue (use hot glue gun or quick-stick heavy duty glue)
- Pencil
- Large letter stencils (you can even print out large letters and cut them out to trace)
- Italian Lights or Globe Lights (I used 2 packs of the 40 bulbs)
- Spray Paint (Metallic and your desired base color – I used KRYLON metallic silver metallic and KRYLON banner red)
- Xacto knife
- Tarp our outdoor area where you’ll spray
STEP 1: Find or create a workspace.
Use a table, use a floor area, use whatever you can use where it won’t matter if you get down and dirty.
STEP 2: Spread out your poster board and place your stencils
If you don’t have stencils and are creating them, I used CAIRO free font in size 650 on a word document.
At this point, everything seems pretty simple and I’m getting cocky.
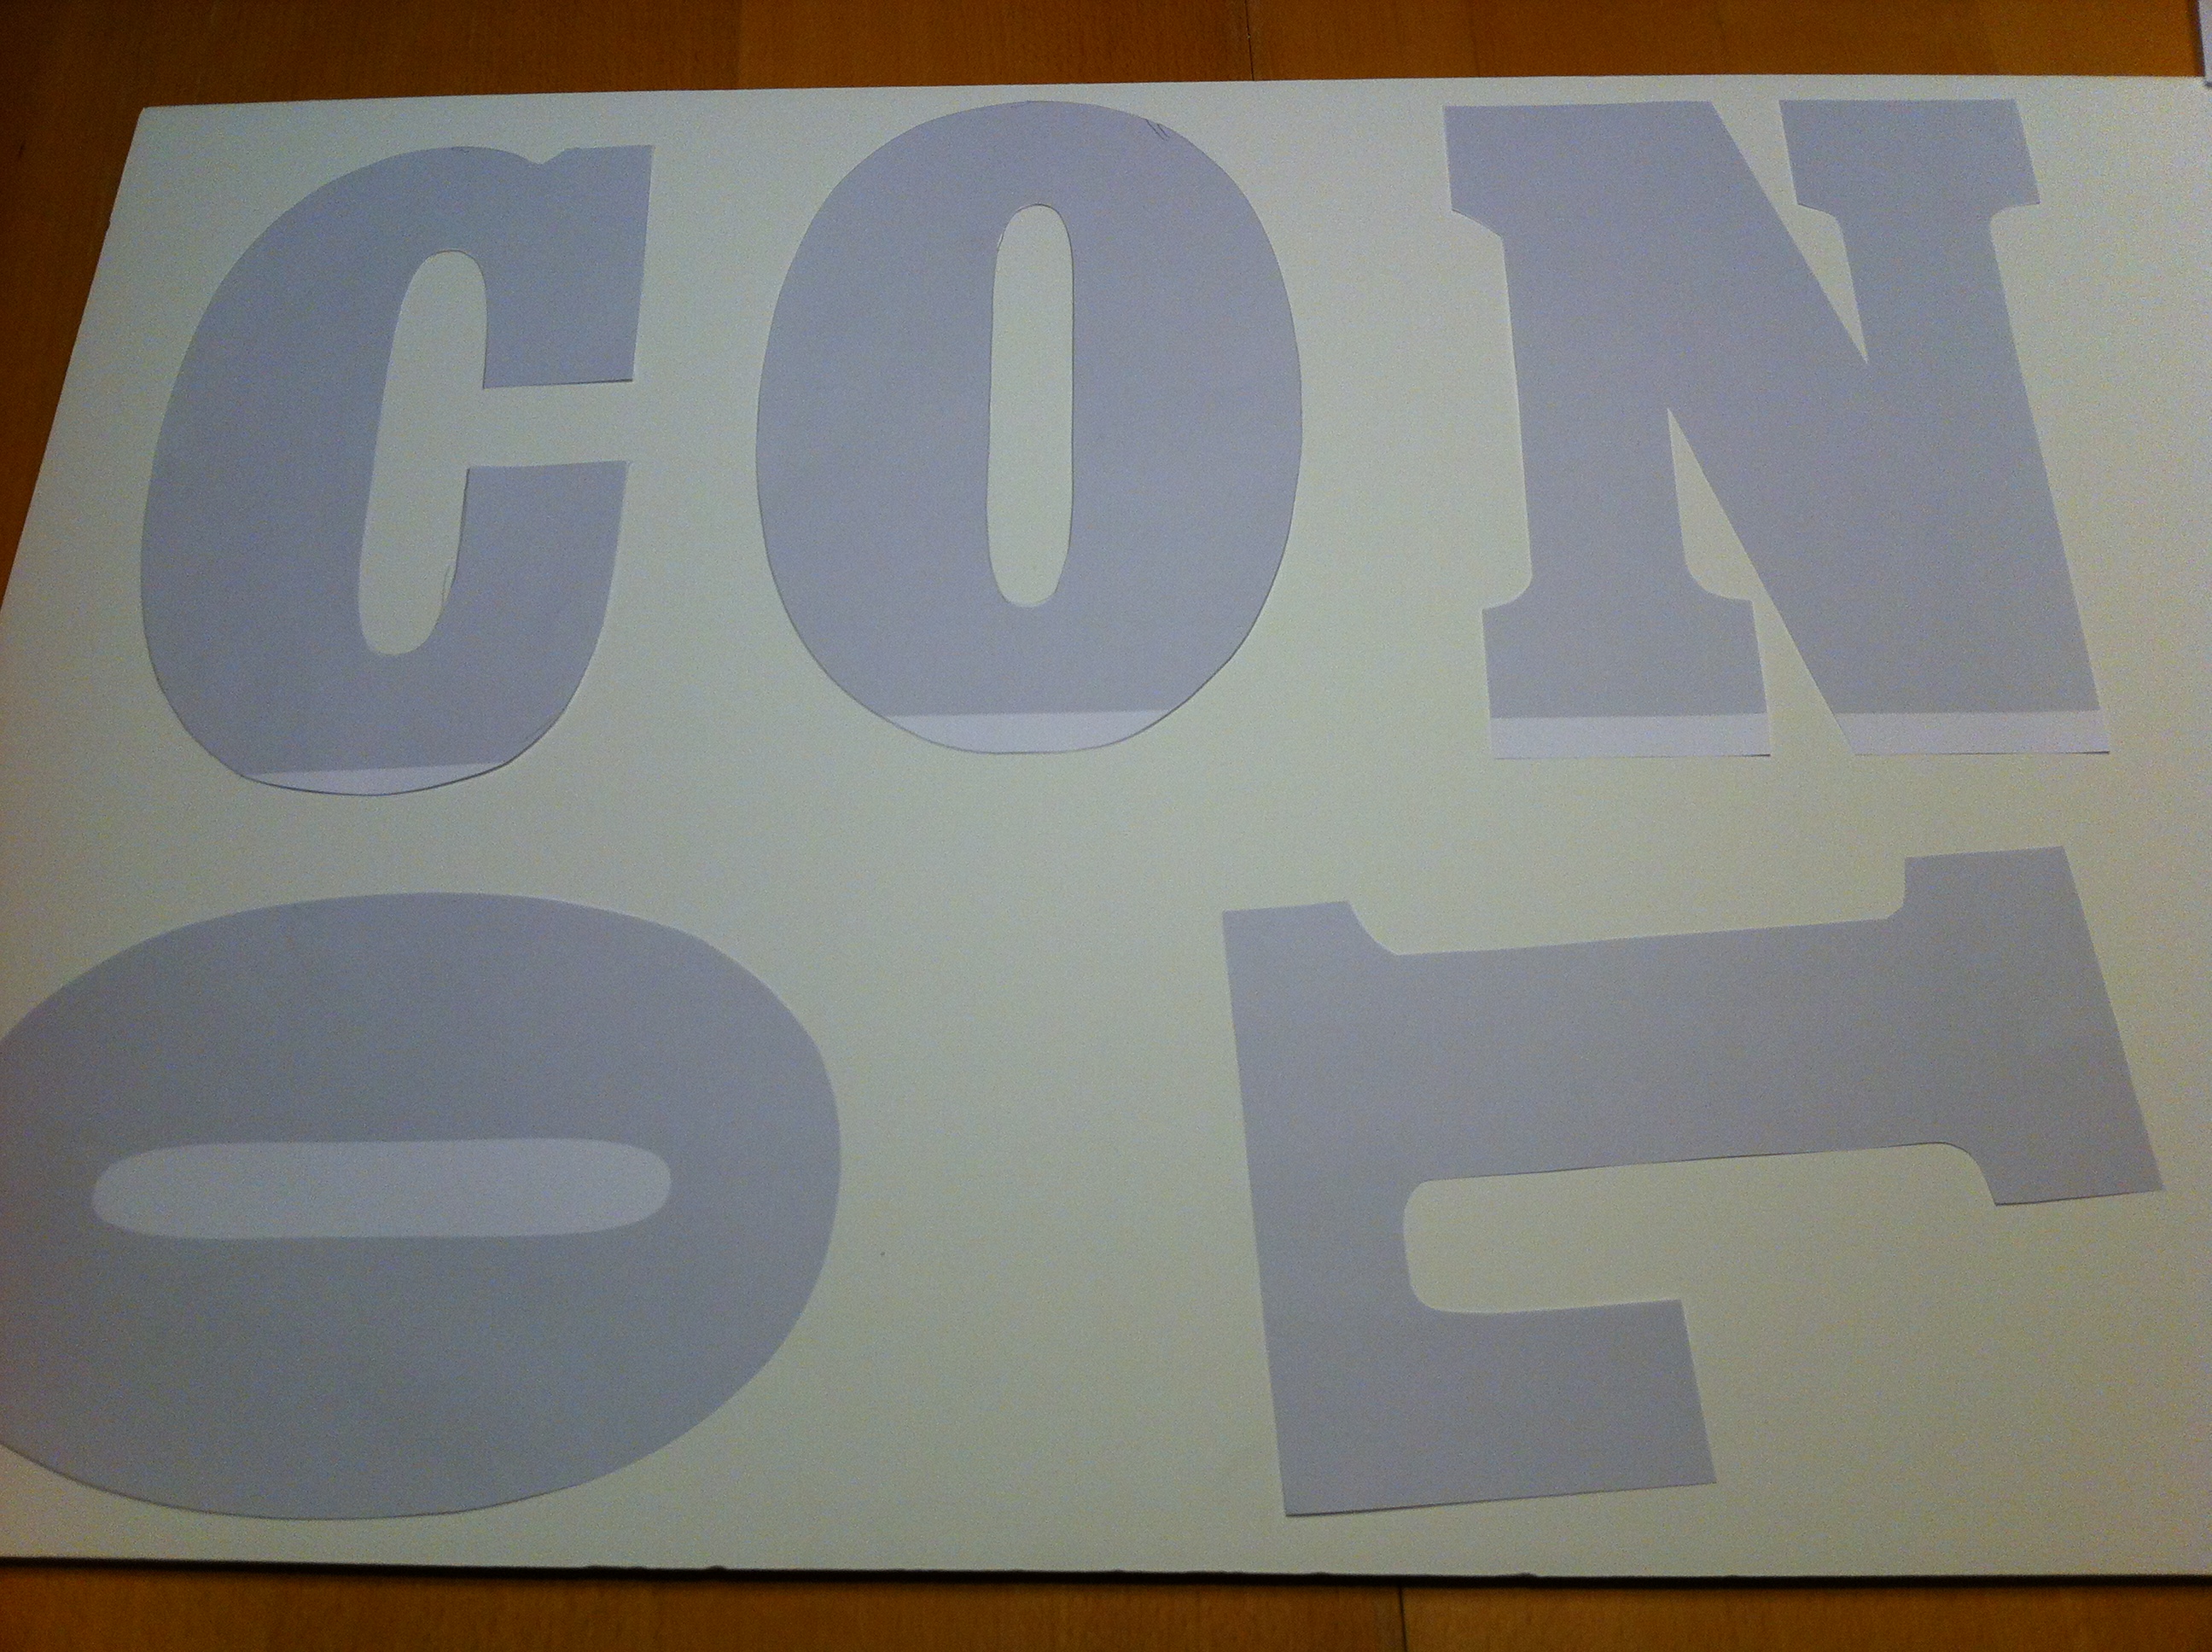
Step 3: Trace and Cut out your stencils
Lay down your poster board and trace your letters. This is where you’ll use your Xacto knife and start swearing. I wanted to get out an effing saw or some sort of laser to burn through what feels like cement. It’s do-able and one of the longest processes ever.


Step 4: Cut out Strips of your poster board
These strips will be what make your letters look like they are made out of metal. It’s the sides. My strips were 6-inches. I cut out one strip and then used that as my “stencil” for the next strips. I went through almost 3 full pieces of poster board. Diet Coke was necessary for this project. Just FYI.
Step 5: Glue your strips to each letter.
Let me tell you what NOT to do. Don’t glue the strips to where your letters are still able to lay flat. After burning my fingers on the hot glue and swearing like a freaking sailor, I discovered that I’d done it incorrectly. Could SOMEBODY have warned me. Just one person. That’d be great. Thanks.
MISTAKE:
Glue your strips on the letters to where the foam is in the center of your strip. For example, if your strip is 6″ thick, you’ll want to glue your letter about 3″ in to have it in the middle. So, the correct way:

Don’t worry about being sloppy with your glue. You can pull off the loose strings plus you’ll paint over it. Random, did you know that “loser” is spelled with just one “o”? I think that’s a pet peeve of mine. Just a spelling tip. Loose (as in, having a bit of slack) has two “o”s and Loser has just one. There you go. Lesson over.
Step 6: Mark your lighting placement and make holes
Before you paint the letters, you’re going to want to make your holes. If you draw them and then paint, you won’t know where to put your lights.
There’s no rhyme or reason for where you put lights. Just spread them far enough apart so the globes don’t knock together. The more lights, the brighter your letter.

I put an X in the place where I wanted my lights and then cut little asterisk’s with my Xacto knife. This way, when I shove my light through, I’ll have a tight fit.
Step 7: Prep your letters for painting
I put my letters on a tarp in the garage. You can do it outside or wherever you want. Be sure to paint in a ventilated area. I find that using a tarp with leftover yard clippings and bark is the classiest way to go. I kid. Well, not totally because it’s clear that I didn’t mind mixing projects.
I’ve got a burn and blister on my hand, my fingers are calloused and I’m on my second time through on this project because of my mistake. After getting super-mad and wanting to quit because of all the ridiculous life-bloggers and DIY experts who made this project look like cake, I got back to it and was determined to pay attention to all the details and share them with you all. The project is inexpensive but it’s time-consuming. If you don’t make big mistakes like me.
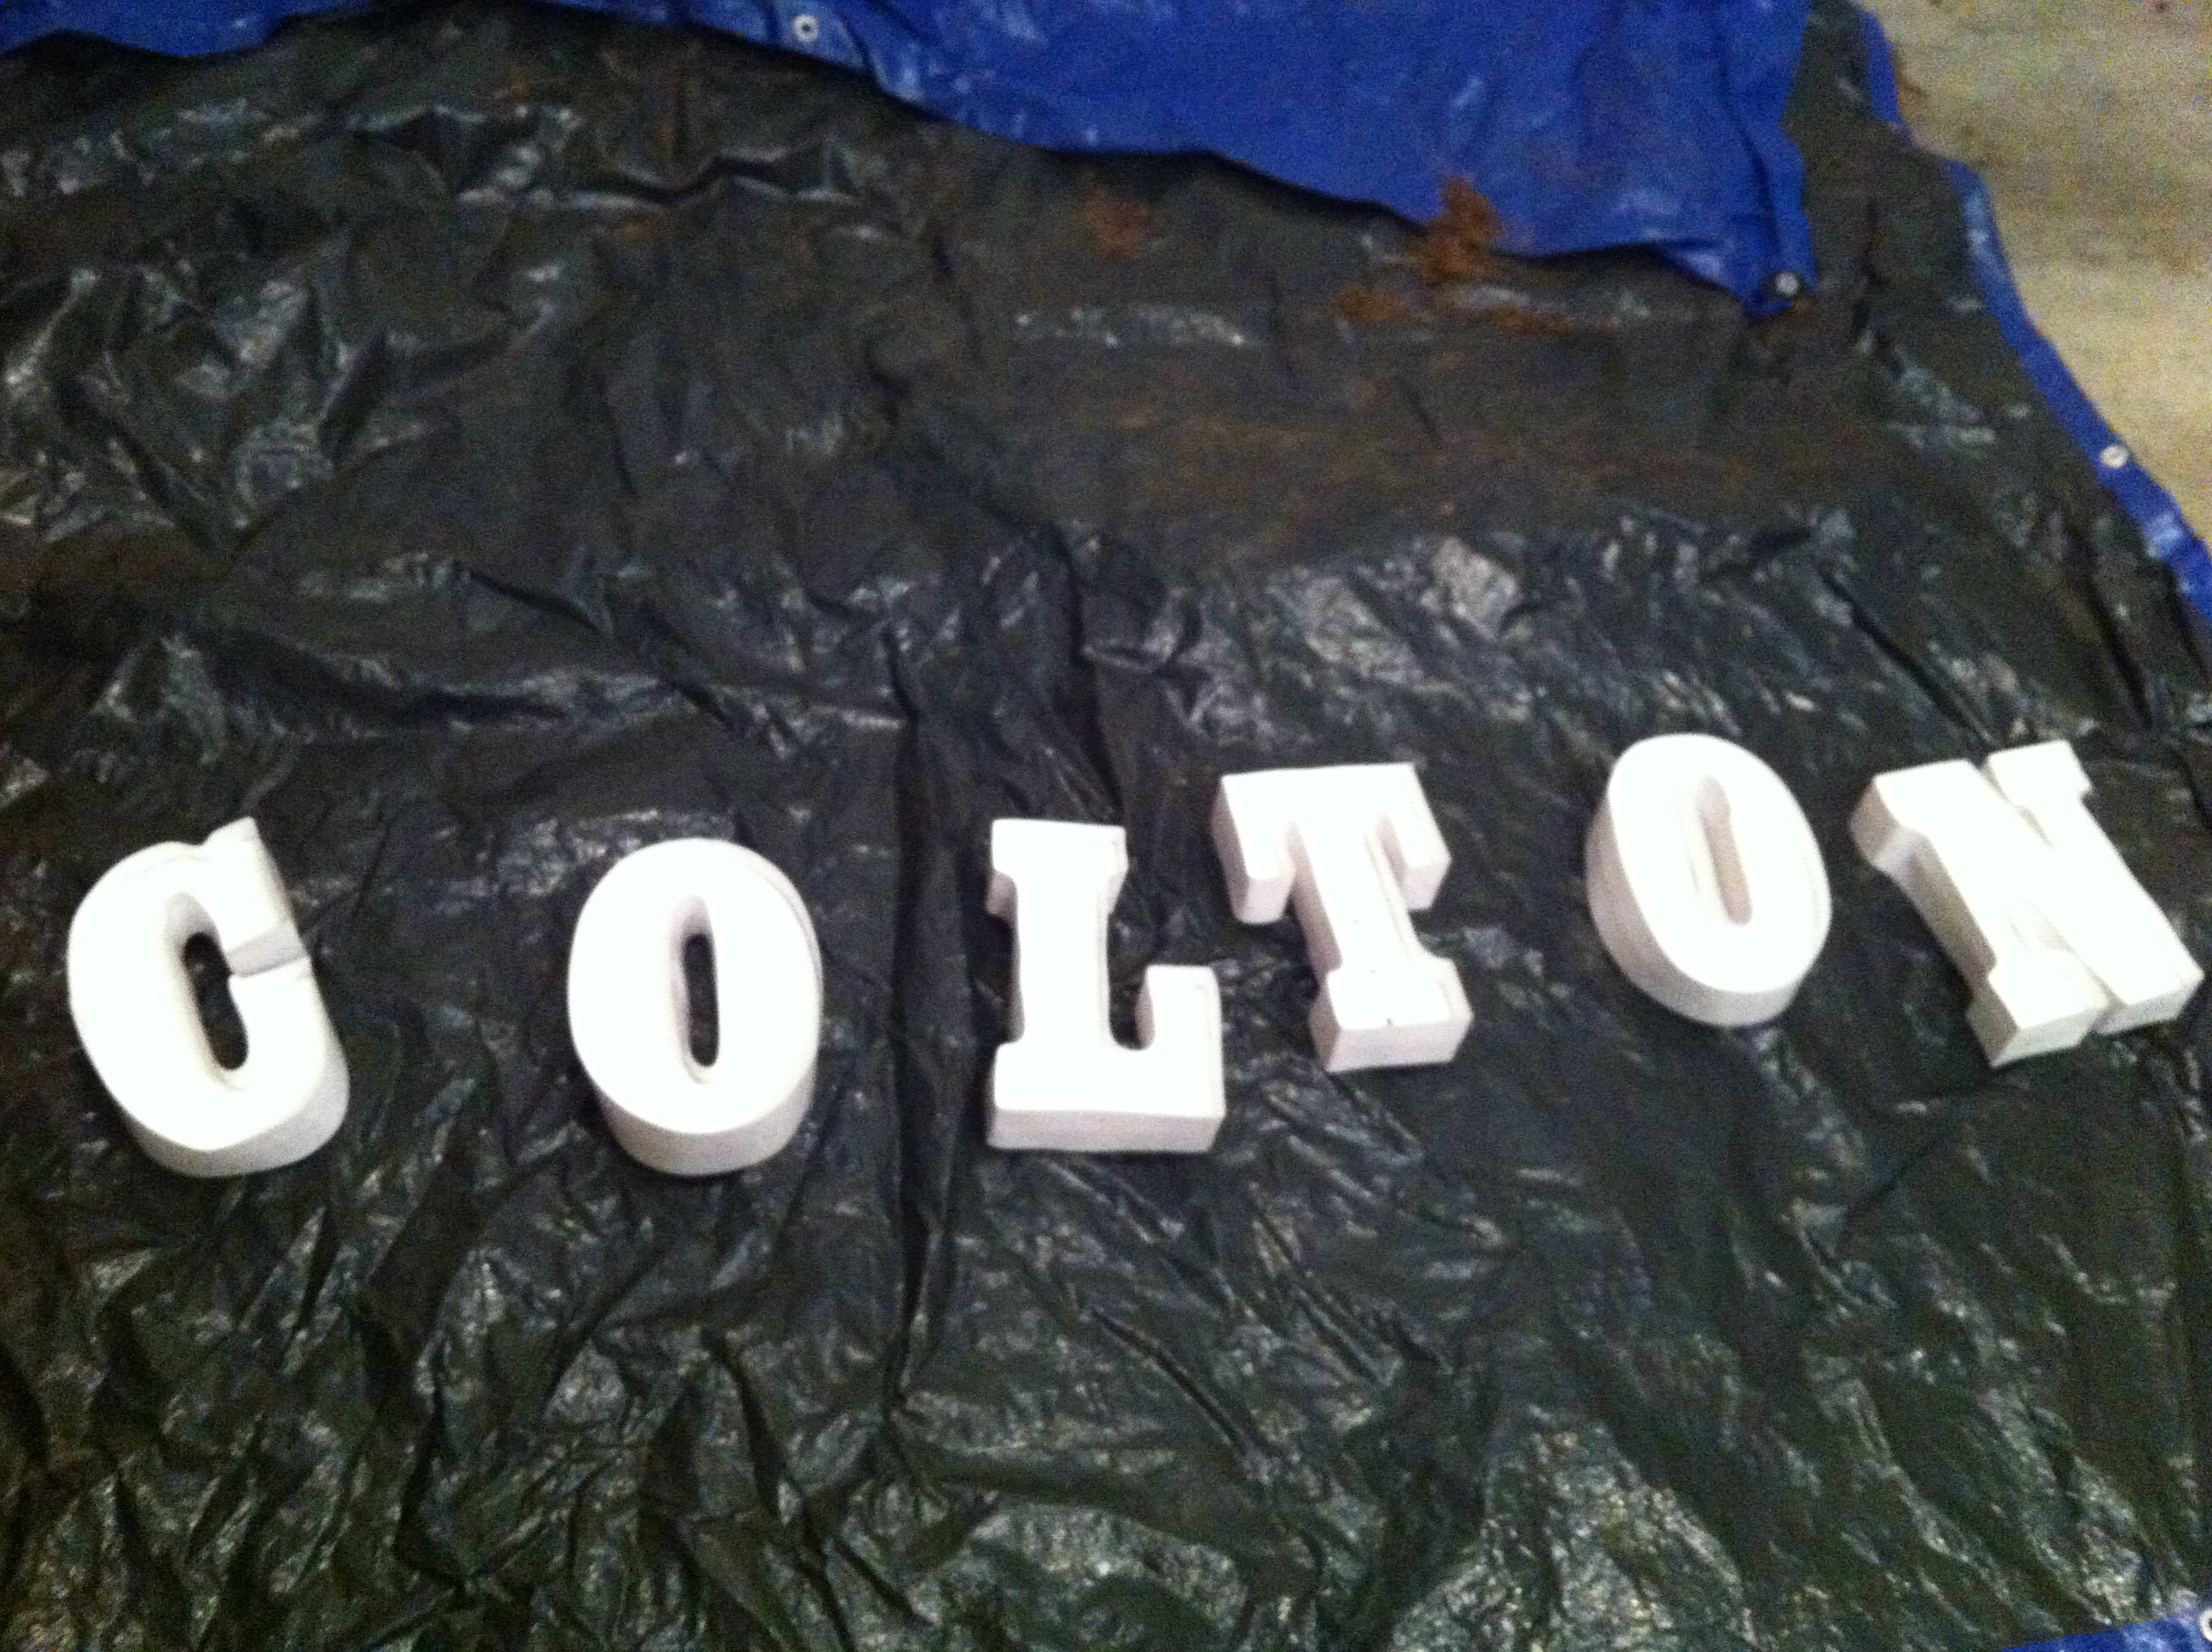
Step 8: Paint letters in metallic paint
Why? This creates a metal-like look for your letters. If you don’t want a metallic base, don’t do it. Simple as that. This is your project.

You don’t have to be particular about any of this. Think of buying a vintage sign. There will be scratches, paint chips and uneven color tones. It’s all part of the fun. Let your paint dry at least an hour before going in for your next color.
By the way, the holes in the T that are visible is me testing out a technique from another blogger. She used a coin to make the hole. All it did with mine is make big ugly holes and appear messy. I’m not saying it’s wrong, I’m just saying…okay, it’s wrong. It’s too hard and sloppy.
Step 9: Paint your letters their final color

This photo is after the first coat of red paint. You can kind of see the metallic paint near the holes. No problem. Wait another couple of hours and add a second coat of paint.
Step 10: Light it up!

Start removing the globes or bulbs from your strand of lights and poke them through the hole. Once they are through the hole, pop the globes or bulbs back in. They should stay securely. If they don’t, add a bit of glue to the base of the light, not the bulb. Keep in mind that you may need to replace one in the future so don’t glue it down.
The back of your letters will be a hot mess with strings. They go all willy nilly but this is why you have that cushion in the back and extra space to work with.
Tip: You can create notches in the side of the light so the strings will go evenly from one light to the next.
The whole hanging on the wall part is a mystery to me. What? I can’t offer you EVERYTHING. At this point, we have the lights sitting on a shelf. We may hang them like pictures or attach a paperclip to the back to have a hanging place for the wall. Either way, it won’t be perfect but it will appear that way.
Are you making your own sign? We want to feature it! Send us pictures when your done and any tips for amateurs!
![]()
*This post was listed in Mad Skill’s Tutorial Party
Hi love this post am about to make one myself but i am a bit confused by where you put the cables at the back do you have a picture please?
Hello Kathy!
I just tucked the cords behind and attached with tape. Since I have it against a wall, nothing shows. I have yet to make a more professional version. Perhaps they can be tucked under the “lip” of the edge on each letter? This is a tricky little bugger.