I love to crochet. Nana taught me when I was really little. Back then I just made crochet chains. Loooooong crocheted chains. I continued to crochet through the years making lots and lots of afghans, but got bored with those. Seriously, how many afghans do you really need? Unfortunately my pattern reading skills are fair at best, and my knowledge of crochet stitches beyond the basics are limited, so I’ve really never advanced past beginner projects.
My sister mentioned she’d love to have some crocheted snowflakes for her tree. The ones that had been passed down through the family that she’d been putting on her tree in the past were falling apart. I decided there’s no time like the present to advance my crocheting skills, and went in search of some snowflake patterns. There are a ton of free patterns out there, but good LORD! I can’t tell you how many I started, then ripped out.

After a lot of frustration, I finally landed on five that worked for me. My end result may not look perfect, but I felt pretty accomplished when I had finished. For the most part they were really easy to do, and my sister loved them! They don’t take long, and once you’ve got the pattern down, you can whip through them pretty quickly. They’d make a great handmade Christmas gift. I’ve shared the instructions with you below.
Good luck and happy crocheting!
 [spacer]
*For all of the snowflakes below, I used white 100% Cotton Crochet thread – size 3 weight 1 (Super Fine), and a Size 8 (1.50mm) crochet hook*
[row][column size=”1/2″]
Snowflake #1

[/column] [column size=”1/2″][spacer]
Instructions:
Ch 6, join with a sl st to form ring
- Rnd 1: Ch 1, 12 sc in ring. Sl st in first sc.
- Rnd 2: Ch 1, sc in first st, (ch 3, sc in next sc) 11 times; hdc in first sc to join and form last loop – 12 ch-3 spaces
- Rnd 3: Ch 1, sc over hdc, *(2 dc, ch 3, 2 dc) in next space**, sc in next space; repeat from * around, ending last repeat at **; join with sl st in first sc.
- Rnd 4: Ch 4, sl st in same st as joining, *ch 2, (sc, ch 3, sc, ch 5, sc, ch 3, sc) in next ch-3 space, ch 2**, (sl st, ch 4, sl st) in next sc; repeat from * around, ending last repeat at **; join with sl st in sl st of last round. End.
[/column] [/row]
 [row][column size=”1/2″]
Snowflake #2

[/column] [column size=”1/2″][spacer]
Instructions:
Ch 8, sl st in first ch to form ring.
- Rnd 1: Ch 7dc in ring, (ch 5, dc in ring) 4 times, ch 5, sl st in 2nd ch of ch 7–6 sps.
- Rnd 2: Sl st in next lp, ch 4 (counts as 1 tr); holding back last lp of each tr on hook, make 3 tr in ch-5 lp, yo and through 4 lps on hook (4 tr cluster), *ch 9, 4 tr cluster in next lp, repeat from * 4 times, ch 9, sl st in top of first cluster.
- Rnd 3: * Ch 7, sl st in 4th ch from hook for picot, ch 9, sl st in 4th ch from hook for picot, ch 3, sl st in top of cluster; in ch-9 lp work sc, hdc, 4 dc, hdc, sc, sl st in top of next cluster, repeat from * around, end sl st in sl st at beg of rnd. End.
[/column] [/row]
[row][column size=”1/2″]
Snowflake #3

[/column] [column size=”1/2″][spacer]
Instructions:
Ch 7, sl st in first ch to form ring
- Rnd 1: Ch 6, (dc in ring ch 3) 7 times, sl st in 3rd ch of ch 6–8 sps.
- Rnd 2: Sl st in next sp; ch 3, 2 dc in sp, (ch 3, 3 dc in next sp) 7 times, ch 3, sl st in top first ch 3.
- Rnd 3: Ch 7, sk 1 dc, dc in next dc, * ch 4, dc in next dc, ch 4, sk 1 dc, dc in next dc, repeat from * around, end ch 4, sl st in 3rd ch of ch 7.
- Rnd 4: Sl st in first sp, ch 4, 2 tr in same sp, ch 4, sc in 4th ch from hook for picot, sl st in last tr, 2 tr in same sp, ch 3, sc in next sp, *ch 3, 3 tr, picot, 2 tr in next sp, ch 3, sc in next sp, repeat from * around, end ch 3, sl st in top of ch 4. End.
[/column] [/row]
[row][column size=”1/2″]
Snowflake #4

[/column] [column size=”1/2″][spacer]
Instructions:
Ch 6, join with sl st to form ring
- Rnd 1: Ch 5 (counts as 1 tr and 2 ch), (1 tr into ring, 2 ch) 5 times, sl st to 3rd of 5 ch at beginning of rnd.
- Rnd 2: Sl st into first ch sp, ch 3 (counts as 1 tr), tr4tog into same ch sp, (ch 7, tr5tog into next ch sp) 5 times, ch 3, 1 dtr into top of first tr4tog.
- Rnd 3: Ch 1 (does not count as st), 3 dc into ch sp partly formed by dtr at end of previous rnd, (ch 9, 3 dc into next ch sp) 5 times, ch 8, 1 dc into top of first dc.
- Rnd 4: Ch 3 (counts as first leg of first tr3tog), tr2tog working first leg into center dc of first 3 dc group and second leg into first ch after 3 dc group, *ch 2, miss 1 ch, 1 tr into next ch, ch 2, miss 1 ch, (1 tr, ch 3, 1 tr) into next ch, ch 2, miss 1 ch, 1 tr into next ch, ch 2, miss 1 ch, tr3tog working first leg into next ch, second leg into central dc of next 3 dc group, and third leg into first ch after 3 dc group; rep from * 4 more times, (ch 2, miss 1 ch, 1 tr into next ch) twice, 18 ch, 1 dc into 16th ch from hook, 1 dc into next ch, 1 ch, 1 tr into same ch as last tr, ch 2, miss 1 ch, 1 tr into next ch, ch 2, miss 1 ch, sl st to top of first tr2tog. End.
[/column] [/row]
[row][column size=”1/2″]
Snowflake #5

[/column] [column size=”1/2″][spacer]
Instructions:
Ch 7, sl st in first ch to form ring
- Rnd 1: (Sc in ring, ch 2, dc in ring, ch 2) 6 times. Sl st in first sc.
- Rnd 2: Sl st in first 2 ch, sl st in dc, ch 3, dc in same dc, (ch 3, sc in next sc, ch 3, 2 dc in next dc) 5 times, ch 3, sc in next sc, ch 3, sl st in top of first ch 3.
- Rnd 3: Ch 3 (counts as 1 dc), dc in next dc, (ch 4, sc in next sc, ch 4, dc in each of 2 dc) 5 times, ch 4, sc in next sc, ch 4, sl st in top of ch 3.
- Rnd 4: Ch 3, dc in next dc, (ch 5, sc in next sc, ch 5, dc in each of 2 dc) 5 times, ch 5, sc in next sc, ch 5, sl st in top of ch 3.
- Rnd 5: Ch 3, dc in next dc, (ch 7, sc in next sc, ch 7, dc in each of 2 dc) 5 times, ch 7, sc in next sc, ch 7, sl st in top of ch 3.
- Rnd 6: Ch 3, dc in next dc, (ch 9, sc in next sc, ch 9; holding back last lp of each dc, dc in each of the next 2 dc, yo hook and through 3 lps on hook) 5 times, ch 9, sc in next sc, ch 9, sl st in first dc. End.
[/column] [/row]
Finishing Snowflakes
To stiffen snowflakes, mix one part glue with one part water in a medium bowl. Stir until smooth. Submerge a snowflake in the mixture, then squeeze out excess liquid, lay the snowflake on a towel or corkboard. Shape it and pin it into place. Sprinkle with white glitter and let dry.
If you have any questions, you can comment below, or feel free to contact us by email: inbox (at) organizedchaosonline (dot) com.


I’m going on my second year of hosting a Pinterest party. I’d been thinking it would be a cool idea to get friends together and craft something up but I could never decide what project to do and who to invited to do that project because all my friends are so different.
Every year as the holidays approach, I’m reminded of my mom telling me about when she was little, her mom hosted a get together called BPFC. The meaning: Be Prepared For Christmas. The ladies would get together and sew their little hearts out in the months leading up to Christmas.
My Nana was a visionary! I wanted to do this.
At that point, the Pinterest party was born.
There are truly no rules to hosting a Pinterest party. You can just come up with a concept in your head and carry it out in a way that works best for your life.
Since “Just wing it” isn’t a sufficient ‘How-To’, I’ll break down how we host our parties.

CONCEPT: When planning my Pinterest party, I knew we would get together and work on projects for Christmas. It could be a gift or decor. Everyone coming to the party, chooses a project from Pinterest they would like to do (in the amount of time they will be at your house) and brings enough for everyone to try it.The instructions are typically to state how many people you expect at the party so each person knows how many people to supply with their chosen project. It sounds pricey but it’s actually not. You can choose yours according to the budget you’re working with. Having everyone choose their own project helps with the conundrum of coming up with something everyone would like to do. TIP: Keep your guest count manageable. 10 guests are plenty. For your party, you can choose whatever focus or theme you’d like.
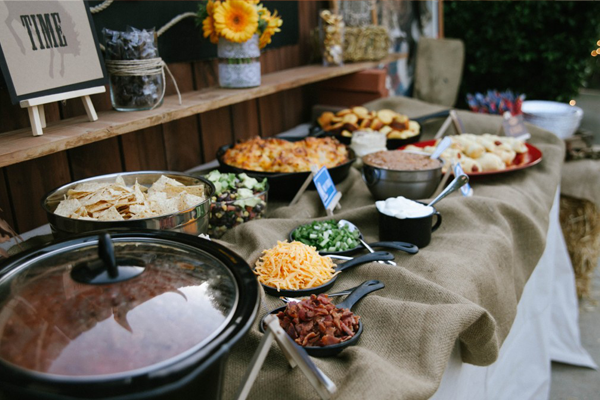
Chili bar by Marigold Mom
click image for more great (and affordable) party ideas
FOOD & DRINK: As the host, it is up to me to plan food and drinks for my guests. This time around, one of my guests actually wanted to cook for the party. Who am I to turn down that offer? We had chili. A creative and very do-able idea is a chili bar. It’s very cost effective. Add some cornbread to the sides and you have a nice meal. In keeping with the “bar” theme, tacos and salads work just as well. As far as the drinks go, you can be as plain or as fancy as you’d like. Hop onto Pinterest and search for party drinks or just keep it simple and put out bottled water, alcoholic and non alcoholic drinks. (party drinks HERE). TIP: Keep the food and drinks away from the craft area.
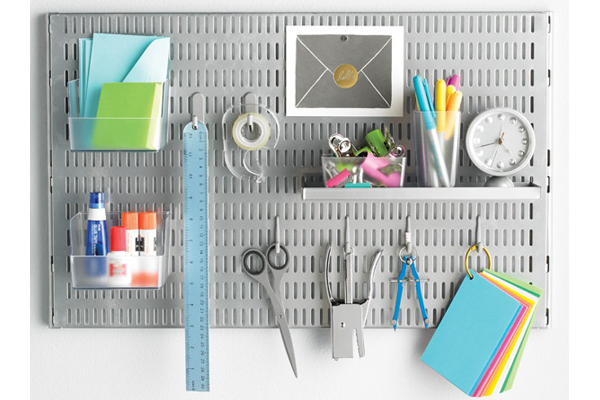
craft storage option from the Container Store
PREP: Even though your guests will each be bringing a project for everyone including the supplies, it’s likely someone will forget something or not realize they needed glue, ribbon, mod podge, etc, until the last minute. Beef up your craft supplies before they arrive. A list of things that are always good to have on hand are:
- Glue Dots
- Scissors
- Glue Stick
- Paintbrushes
- Cardstock paper
- Xacto knife
- Pencils and Pens

CRAFT AREA: All your guests will have questions for one another, will want to see what the other is doing and will be chatting it up like crazy. It’s a super-fun night so be sure you have an area where everyone can sit down close to each other. You can set your Pinterest party up at an extended kitchen table or even a folding table with a festive cover.

TIME: As fun as it is crafting it up with a bunch of great girlfriends, the length of time is important. This goes for both you and your guests. Of course they can stay longer but 3-4 hours is plenty of time for what you want to do.

ADDITIONAL TIPS:
- NO KIDS: Unless your children are involved in the project or being watched by someone not participating in the party, it’s not advised to have children present. Why? They will want to do what you’re doing, be in the mix and distract you from being engaged in your project with friends. Plus, there’s a safety element that plays into it if you’re using scissors and knives.
- NO BYSTANDERS: While it’s awesome to sit and visit with a friend, someone just dropping by to chat it up isn’t a part of the group’s activity and, just like children, will take your focus off what you’re doing.
- NO IN-DEPTH PROJECTS: Keep it quick. If the craft can’t be completed in the time of the party, save it for something you do at home. A Pinterest party is self-contained. This means, whatever materials are brought into your party are the same materials that are carried out of your party. No overnight drying, coming back for phase two of the cutting, etc. Also, encourage your guests to bring a new project they haven’t tried before. I went to one party where a lady just brought some stuff she’d been working on and thought this was a good time to continue with it. The problem was that she just came to do her own thing while the rest of us were introduced to new ideas, suggestions, successes and fails.
- BE VERY SPECIFIC: Are you asking that your guests bring guests? If not, state that in the invitation by letting them know you’re keeping it to a set amount. Your guests should be informed of every event detail so they can properly plan for the festivities.
- HAVE FUN. This isn’t Martha Stewart. It’s so fun being around people who are trying these projects for the first time. Some of your friends will be those natural crafters who can make anything look good. Other friends are total Pinterest fails every time they try. It’s awesome. Truly.
Oh, yes. This Pinterest stuff is serious business!
Have you seen our boards? We can be found HERE. What’s your Pinterest account? Comment below so we can see inside your minds and follow your boards.

I saw these on The Martha Stewart show. I felt so bad for the girl showing how to make these because Martha kept interrupting her. The longer I watched the show, I noticed Martha interrupts everybody, and the poor guests become visibly stressed because they know their time is running out. Wow, totally got derailed there, sorry.
Anyway, here’s one of my challenge DIY posts. I’ll post what it’s supposed to look like, then show you what MINE looks like.
Here’s Martha’s:

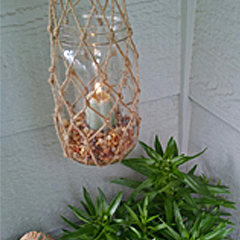
I found everything I needed to make this project right in my home. I did it while I watched a Lifetime movie. It was really relaxing and reminded me of doing macrame. My knots didn’t end up very even, but I think you’d get better at this the more you did it. I’m going to make a few more and hang them out on my deck.
And…here’s mine.
Whaddya think? Perfect for relaxing in the backyard on a hot summer night.
Tools and Materials
- Glass jar (we used a Ball jar, but a fishbowl, vase, or glass hurricane would also work)
- Strong twine such as jute or hemp
- Scissors
- Pins and/or tape
- Lanyard Knot diagram
- Corkboard for work surface (optional)
- Ruler
- Rubber bands
- Metal O-ring (optional)
- Cow Hitch diagram (optional)
- Wrapped knot diagram (optional)
- Pebbles, candles, plants, etc. for filling jar
Knotted Hanging Lantern How-To
- Turn jar upside-down. Wrap twine around jar vertically (starting at mouth, going over the bottom and back down to the mouth). Multiply this length by 10. Cut eight lengths of twine to that measurement.
- Divide lengths of twine into two bunches of four. Cross these bunches in the center and pin or tape to the work surface to form an “X.” Treat each bunch of four as one strand and follow the diagram for the Lanyard Knot to make the starting knot.
- Measure the diameter of the bottom of the jar, and divide that measurement in half. Tie an overhand knot to secure two adjacent strands together, and repeat all the way around (you will end up with 8 knots).
- Drape knotted twine over inverted jar, lining up center knot with center of jar bottom. Tape center knot in place. Place rubber band over ball jar and twine to secure. Space twine strands equally around jar, using rubber band to hold in place.
- Tie one strand from each adjacent knot together, creating a row of overhand knots. Use the rubber band as reference to keep knots at the same height on the jar. Do the same to create another row of knots, and repeat until you reach the mouth of the jar.
- Flip the jar right side up. With the remaining lengths of twine, tie the netted lantern to a tree branch or beam. Optionally, gather twine strands, thread through a metal O-ring and secure using a cow hitch knot. Finish with wrapped knot directly below the cow hitch and trim extra twine. The jar can be filled with candles, LED lights, pebbles, and/or plants.
Safety Tip: If using a real candle in the lantern, tie or add hardware to the twine at least one yard from where the wick of the candle will be positioned. Light the candle first, then lift the twine and hang the lantern, being careful to never let the flame come in contact with the twine.